
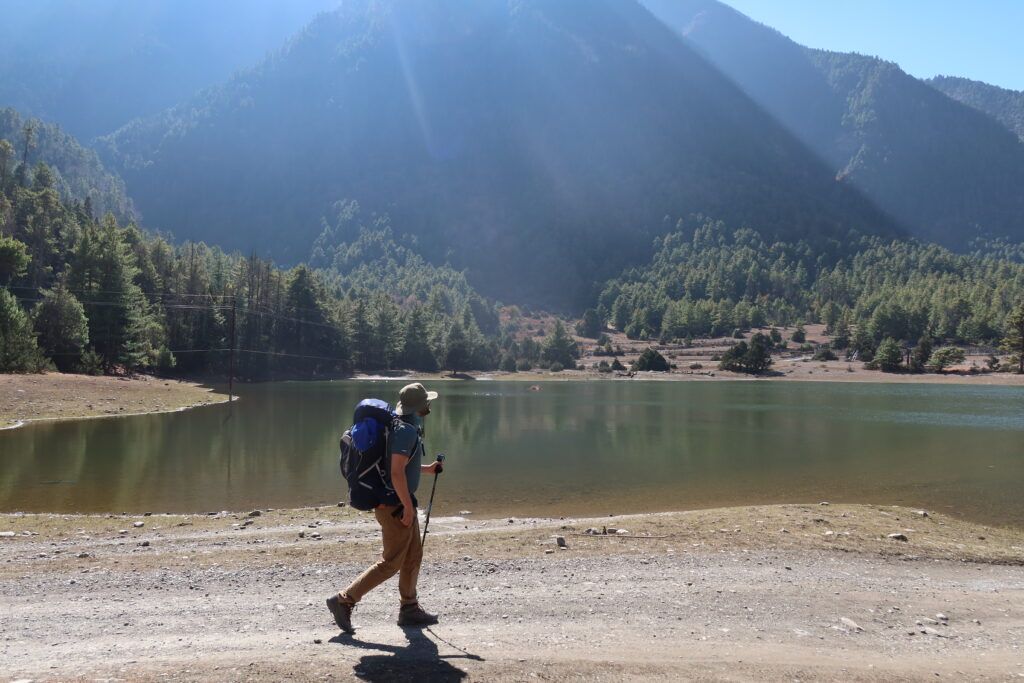
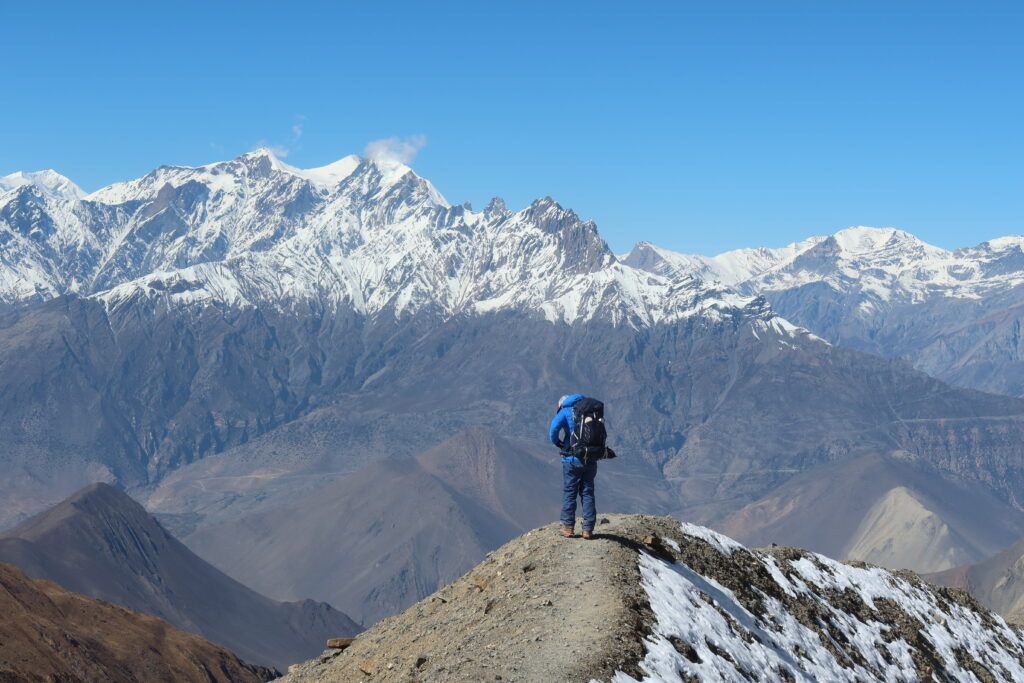
One of the world’s iconic treks, the Annapurna Trail in Nepal stands as a testament to the grandeur and diversity of the Himalayas. Meandering through an exquisite tableau of ancient villages, this hike offers adventurers a chance to immerse themselves in a myriad of cultures, each deeply rooted in the rich history of the region. As you traverse the trail, the roar of mighty rivers cutting through deep gorges becomes a familiar sound, punctuating the serene ambiance of high mountain lakes that reflect the pristine skies.
But it’s not just the landscape that leaves an indelible mark; the cultural tapestry of the Annapurna region is equally captivating. Each village along the Annapurna circuit trek tells its own tale, preserved through centuries, waiting for the keen ear of a traveler. The journey culminates in the challenging yet awe-inspiring ascent to the Annapurna Pass (Thorong La Pass). At 17778.87 ft (5,419 m), it proudly holds the title of the highest walkable pass, offering panoramic views that are nothing short of breathtaking.
For those seeking flexibility in their expedition, the Annapurna Trail provides both main roads and side trails for most of its stretch. However, it’s essential to approach with a touch of caution and respect for Mother Nature. The unpredictable Himalayan weather can occasionally wash these paths away, making adaptability a crucial trait for every hiker.
In essence, the Annapurna Trail isn’t just a trek; it’s a journey through time, nature, and culture, offering experiences that linger long after the trail ends. Whether you’re an avid mountaineer or someone looking for a challenging but rewarding experience, this classic Himalayan adventure promises memories that will last a lifetime. Even if the time of the future is slowly catching up in this region.
Table of Contents
General info about the trail
- Annapurna circuit trek distance: Between 75 MI (120 km) or 137 MI (220 km), depending on where you start and finish
- Elevation Gain: 33,159 ft (10,107 m) for 10-day hike
- Elevation Loss: 33,159 ft (10,107 m) for 10-day hike
- Highest Point: Thorong La Pass at 17,769 feet (5,419 m)
- Duration: 10 to 21 days
- Difficulty: Moderate to Very Hard (especially when crossing the pass)
- Starting/Finishing Point: Bessisahara / Chame – Muktinah / Jomson / Birethanti
- Camping: N/A
- Average Distance per Day: 7.5 mi (12km) to 10.5 mi (17km)
- Total Cost: Approximately $800 on the trail (10 days, two people), around $1500 with flights and stay in Nepal for a month
- Gear Weight: 10 kg (water, clothes, snacks)
- Access: Public transport or jeeps can be used to get to the starting point
- Replenishment: Available in every village daily
- Water: Purifier recommended; sources are easily accessible
- Guidebook: “Trekking Annapurna” by Cicerone
- Annapurna Circuit Trail Map: Download
Guided or unguided hike
Prior to 2023, the freedom to hike the Annapurna Trail independently was a cherished experience many sought after. However, with the updated regulations introduced in 2023, Nepal has mandated the use of a guide for almost all its treks, including this one (although the rules are still unclear).
When choosing a guide, it’s essential to budget appropriately. The standard fee for guides revolves around $20 per day. This cost, however, is a baseline; meals, transportation, and accommodations for the guide are additional.
However, a word of caution for those considering sourcing their own guide:
- Credentials and Experience: Always ensure your guide is certified and has extensive experience with the trail you’re embarking on.
- Language Proficiency: It’s essential that you and your guide can communicate effectively. Check for language compatibility beforehand.
- Reviews and Recommendations: Previous trekkers’ experiences can give insights into the guide’s reliability and expertise. Seek recommendations or read reviews.
- Emergency Protocols: Your guide should be well-versed in emergency procedures and have a solid plan for potential risks.
- Cultural Sensitivity: Part of the trek’s allure is the rich Nepali culture. A guide who grew up in the region you are going to can enrich your journey, ensuring respectful interactions and deeper understanding.
Getting a guide/tour via a tour company in Europe/USA
For those seeking a truly hassle-free experience trekking Annapurna Massif, opting for a comprehensive package is the pinnacle of convenience. By choosing this approach, every detail of your journey – from flight tickets and accommodation to transportation – is expertly handled for you.
What sets these packages apart is their (supposedly) attention to quality. Not only are the guides (should be) pre-selected and vetted for their profound knowledge of the region, but they also come equipped with top-tier skills and gear. This ensures that you’re accompanied by the best of the best, turning your trek into an enlightening and safe experience.
While the cost is on the higher end, ranging from $2000 (excluding flights) to a steep $5000, the value lies in the peace of mind it offers. Without the burdens of meticulous planning and troubleshooting unforeseen issues, you can immerse fully in the adventure. Should any hiccup arise, rest assured there’s a dedicated professional at hand, ready to navigate and resolve the situation for you.
In essence, if budget isn’t a constraint and you prioritize seamless execution over hands-on planning, this premium option will ensure your Annapurna expedition is as memorable as it is effortless.
Getting a guide / planning everything by yourself

Navigating your own Annapurna circuit hike can be a thrilling experience, but with the new guide regulations, your top priority becomes finding the perfect companion for the trail.
Here’s a quick rundown on sourcing a guide:
- Online Research: Many reputable guides are listed online. While some of the high-end guides might have been featured in news articles or reviews, it’s essential to remember that not all good guides have such publicity. Use these platforms to gauge their expertise and regional knowledge.
- Social Media: Active Facebook groups dedicated to the Annapurna trek are gold mines for firsthand advice. By posting a simple query about recommended guides, you can potentially receive numerous responses from trekkers (and guides) who’ve recently explored the region. My suggestion is to ignore messages from the guides. It’s hard to vet them.
- Local Options: Kathmandu’s Thamel neighborhood is renowned for its cluster of travel agencies and freelance guides. This approach provides the added benefit of face-to-face interactions, allowing you to gauge the guide’s authenticity and competence.
But wait, how do you shift through the vast choices and determine the guide’s competence?
- Vetting and Recommendations: Understandably, anyone can claim to be a seasoned guide. To eliminate uncertainty, seek recommendations from previous trekkers. Those with positive experiences are usually more than willing to share their guide’s contact information.
- Gear Assessment: A professional guide will have the appropriate gear. Before committing, politely request photos of their equipment. Confirm its adequacy in person, ensuring they’re not planning to trek challenging terrains in jeans and flip-flops!
- Reference Checks: An experienced guide should have no qualms about sharing references from past trekkers. Reach out to these individuals for an unbiased perspective on the guide’s capabilities and conduct during the trek.
- Bare Essentials: If your primary intent in hiring a guide is merely to satisfy the regulations, you might be less stringent with your criteria. However, even in such cases, it’s crucial to ensure your guide possesses basic necessities like warm clothing and proper footwear.
In essence, while planning independently provides a sense of adventure, it also requires diligence to ensure your Annapurna trek is both enjoyable and safe. With the right guide by your side, you’re set for a memorable expedition!
Sherpas
Sherpas are often the unsung heroes of treks in the Himalayas. However, the term “Sherpa” has evolved, and nowadays, it doesn’t always specifically refer to the ethnic group native to the high-altitude regions in Nepal. Today, many individuals from various backgrounds may take on the role of a Sherpa. Many of these individuals come from the lower regions. Meaning they have little experience living in the mountains. It might be even that it is their first time going there.
If you’re considering hiring a Sherpa to assist with your trek, it’s vital to keep a few key points in mind:
- Altitude Sickness: While Sherpas traditionally hailed from high altitudes, many modern-day Sherpas come from lower elevations. As such, they’re equally susceptible to altitude sickness as any other trekker. Regularly check in with them to ensure they’re not displaying any symptoms, especially when climbing to greater heights.
- Proper Gear is Crucial: It’s alarming how often Sherpas, despite their integral role in a trek, are inadequately dressed for the cold. Some might embark on the journey in basic attire like jeans and t-shirts, which can be life-threatening in frigid conditions. It’s your responsibility to ensure that any Sherpa you hire is suitably equipped for the weather and altitude challenges.
- Hiring Through Agencies: If you’re securing the services of a Sherpa through an agency or via a guide, it’s reasonable to expect that they come well-prepared. After all, you’re paying for a premium service. However, it’s always wise to double-check their gear before the trek.
- Personal Responsibility: In the event your Sherpa is not adequately equipped and you’ve chosen to hire them independently, you might find yourself in the position of needing to supply them with the necessary gear. Always remember that ensuring their safety is as critical as your own.
The best time to visit
 Traditionally, the Annapurna Circuit Trek is best undertaken during the spring months of April and May, as well as in the autumn months of August and November. During these periods, the weather is predominantly dry, significantly reducing the chances of disruptive rain or snow. This helps avoid potential hazards like mudslides, ensuring a safer and more enjoyable trekking experience. It’s worth noting, however, that while April and May generally offer warmer temperatures, they tend to be cloudier compared to the crisp clarity of the August to November window.
![]()
Yet, it’s essential to keep in mind the shifting weather patterns, a consequence of global climate change. In recent years, the predictability of the monsoon season has waned. For instance, 2022 saw the monsoon stretch into early August, resulting in unexpected heavy rainfall. This led to a temporary halt in Annapurna circuit trekking activities, with many hikers stranded in the villages of the Annapurna region for the first 2 weeks of the month.
Given these uncertainties, prospective trekkers should exercise caution and flexibility in their planning. A prudent approach would be to target the middle of the traditionally favorable months to avoid the edges of the unpredictable monsoon season. Thus, a recommended time frame would be mid-August to mid-November for the autumn season and mid-April to mid-May for spring. This strategy offers the best odds of favorable weather conditions, ensuring a memorable experience on the Annapurna Circuit Trek.
Getting into Nepal
Truly, for those journeying from the EU or the USA, the most viable means to reach Nepal is by air, with your destination being Kathmandu, the heart and capital of Nepal.
I would recommend allocating a few days in this vibrant city before embarking on your trek.
We found a nice recently constructed hotel [Hotel Name and Link to Booking.com]l that offered quiet time in the city, clean rooms and a tasty kitchen.
Not only will this allow you some time to acclimate, but Kathmandu also offers a plethora of options for gear shopping, ensuring you’re well-prepared for your adventure (more on this in the subsequent sections).
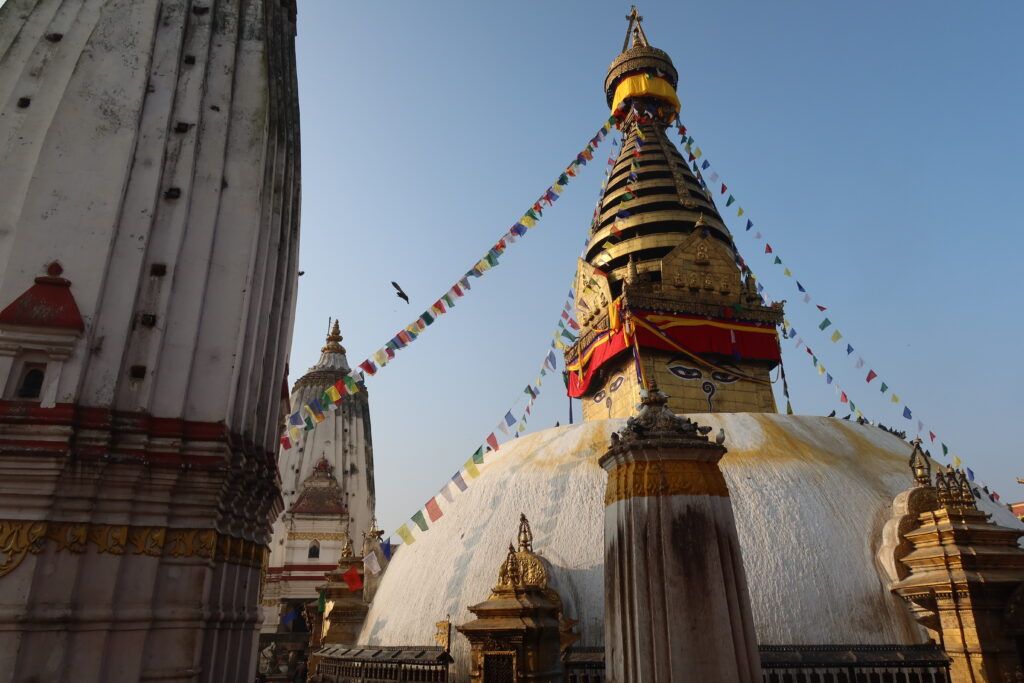
Moreover, once you’ve concluded your trek, it’s worth spending a couple more days immersing yourself in the city’s rich tapestry of history and culture. From ancient temples to bustling markets, Kathmandu is a treasure trove of experiences waiting to be explored.
Visas
Securing a visa is essential for your trip to Nepal. Fortunately, the process is streamlined for travelers. Upon your arrival at the airport, you can obtain a visa on the spot. The cost for a one-month visa is $35. Should your adventure in the breathtaking landscapes of Nepal beckon you to stay longer, there’s flexibility at hand; you can extend your visa up to a total duration of three months. So, whether you’re there for a brief trek or an extended exploration, Nepal has provisions to accommodate your plans.
Getting to the start of the trail
Embarking on the Annapurna Circuit trek requires a bit of a journey before you even set foot on the trail.
To get to the starting point, you’ll need a combination of a bus and at least one jeep ride, translating to a travel time ranging from 8 to 14 hours.
Many trekkers opt to head to Pokhara first, a fantastic place to stay at is Fish Tail Lodge, deposit their excess luggage, and then proceed to the trailhead.
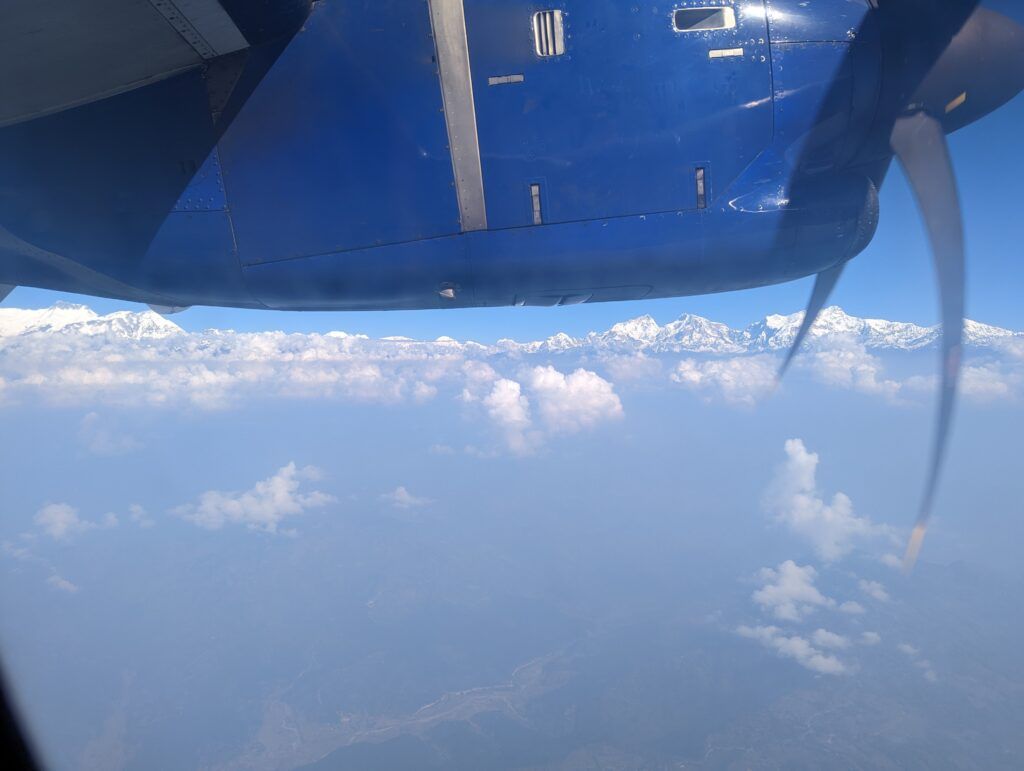
The journey from Kathmandu to Pokhara can be achieved in 6-8 hours by bus. There’s also the option of a quick 20-minute flight. However, it’s worth noting that Nepalese domestic flights have had safety concerns in the past (falling planes from the sky. 2 planes crashed alone in 2022). With that in mind, I’d recommend opting for land travel — either by bus or, for a more comfortable experience, a private jeep, especially if your budget permits.
The serpentine roads and scenic views along the way are an added treat to kickstart your trekking adventure.
Getting to the start of the trail from Kathmandu
Bus from Kathmandu To Dumre
Securing a bus ticket from Kathmandu is straightforward; usually, your hotel can assist you with the purchase.
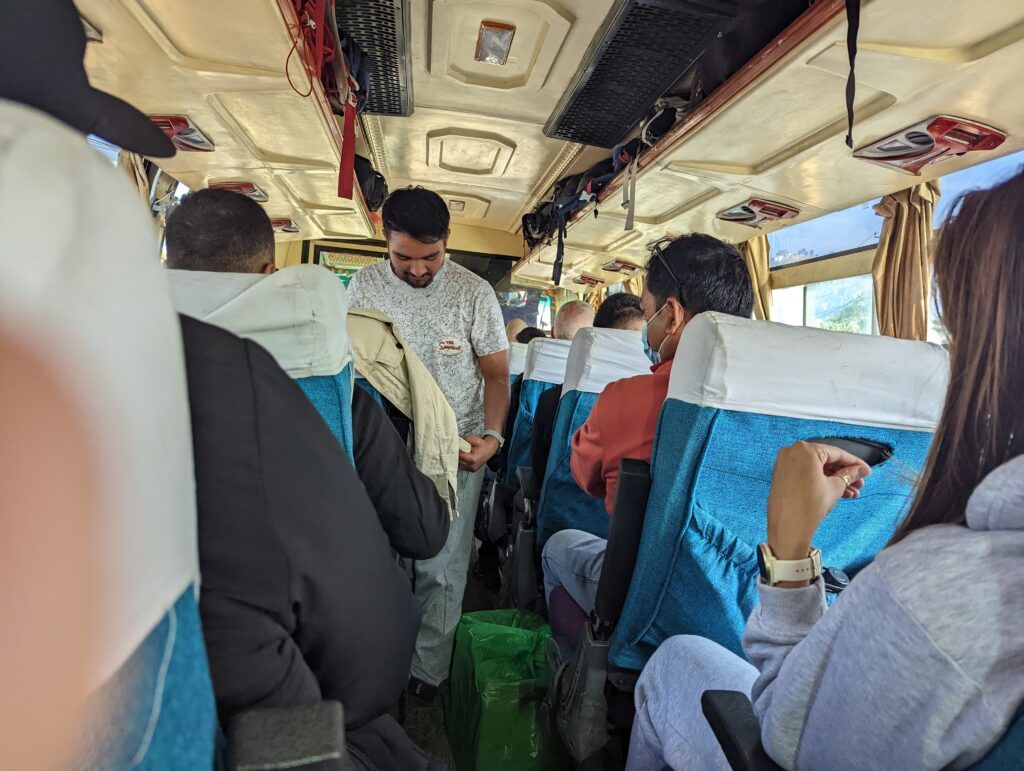
Typically, the fare hovers around $10 per person. You’ll find two primary categories of buses: the Local and the “Premium” — and yes, I’m using the term “Premium” rather loosely here.
- The Local Bus (~$5): Embarking on this ride is an adventure in itself. Expect to be aboard a decades-old bus, possibly sharing space with farm animals. And those seats? They’ve seen better days, with a few that might be on the verge of breaking. Nonetheless, it’s a quintessential Nepali experience.
- The “Premium” Bus (~$10): Slightly more comfortable, this bus is perhaps half the age of its local counterpart. The seats, though still worn, offer a bit more comfort.
Both buses will have scheduled stops for meals. While these roadside eateries offer a taste of local cuisine, don’t anticipate gourmet meals or impeccable hygiene.
They are budget-friendly, but there’s a slight chance your stomach might protest. If you’re not accustomed to local food, you might experience a bit of an upset stomach, so always have some medications at hand.
Pro-tip: Keep your GPS active and monitor your route. It’s possible the bus driver might miss or forget your stop, so being vigilant will ensure you disembark at the right place. Safe travels!
From Dumre To Besisahar (Official start if you plan to do an original 136 mi (220 km) hike)
Arriving at Dumre provides you with a choice of three transportation options to get to Besisahara, each catering to different comfort levels and budgets:
- Local Bus: The most economical choice, the local bus is also arguably the most adventurous. Don’t expect spacious seating or air conditioning; instead, prepare to be immersed in local culture and possibly share space with locals transporting food, livestock, and various goods. This option is not for the faint-hearted or those seeking comfort, but it’s an authentic experience that offers a real glimpse into daily life in the region.
- Taxi Jeep (Shared): A midpoint between the local bus and a private jeep, the shared taxi jeep is somewhat more comfortable and certainly faster, taking approximately 2 hours to reach Besisahara. However, it’s essential to note that “shared” means the vehicle will be filled to capacity. Expect to pay around $20 per person – a price inflated for tourists. Still, the swifter journey and increased comfort can make it worth the price for many travelers.
- Private Jeep: The epitome of comfort and convenience on this route. A private jeep offers the luxury of traveling at your own pace, with ample space and no need to share with other passengers. The price, however, is significantly higher than the other options, and can vary depending on factors such as season, demand, and negotiation skills. If comfort and convenience are paramount, and budget is not a constraint, this is the optimal choice.
In conclusion, your choice depends on your priorities – whether it’s to save money, experience local culture, or ensure a comfortable ride. Whatever you choose, the journey to Besisahara promises to be memorable.
Jeep from Kathmandu directly to Besisahar
Opting for a jeep from Kathmandu to Besisahara offers a bit more luxury, especially when compared to the bus alternatives. This mode of transport can accommodate up to 7 passengers, making it ideal for groups or those who value personal space and a less crowded experience.
The cost is on the steeper side, approximately $50 per person or $350 for the whole jeep. However, for that premium, you’re getting a smoother and more personalized travel experience. One notable advantage of hiring a jeep is the flexibility it provides. Unlike the set routes and stops of a bus, with a jeep, you can request specific stopovers, whether it’s for capturing a scenic view, stretching your legs, or dining.
Speaking of meals, if you’re someone who’s a tad finicky about food hygiene or is keen on trying higher-end local cuisine (again, loosely used term), the jeep driver, upon request, is more likely to stop at restaurants that are a notch above the typical roadside eateries. While these places might be a bit more expensive, they generally offer better food quality and cleaner facilities.
In conclusion, if your budget allows and you’re looking for a more pleasant journey, the jeep is definitely worth considering.
From Besisahar to Chame (The new starting point for a 10-day hike at 9514 ft (2900 m))
The concluding leg of your journey, perched at an altitude of 9514 ft (2900m), is no less if more thrilling than the preceding stretches. Spanning approximately 31 mi (50 km )that takes 6 hours, this jeep ride, priced at $30 per person, is not for the faint-hearted.
Navigating what could be described as some of the most daunting road, this route presents its own set of challenges and adventures for your mind.
Our experience was made all the more intense as we undertook this journey under the veil of night. The obscurity of the night concealed the treacherous terrains, but the palpable tension and the periodic jolts kept us aware of the road’s unpredictable nature.
Moreover, having boarded the last jeep out of Besisahara, we found ourselves stationed in the rear section of the jeep’s trunk, intensifying every bump and turn. We were in a way very happy for not seeing when wheels were above the abyss.
While the journey was undoubtedly nerve-wracking, reaching Chame brought a sense of accomplishment and relief, marking the end of a voyage riddled with adrenaline and anticipation.
Whether you choose to travel by day or night, the journey promises a roller-coaster of emotions, set against the backdrop of Nepal’s mesmerizing landscapes and huge cliff drops centimeters from your car.
Pro Tip: Opting for this starting point, bear in mind that some can already start experiencing mountain sickness upon arrival.
What to expect on the trail
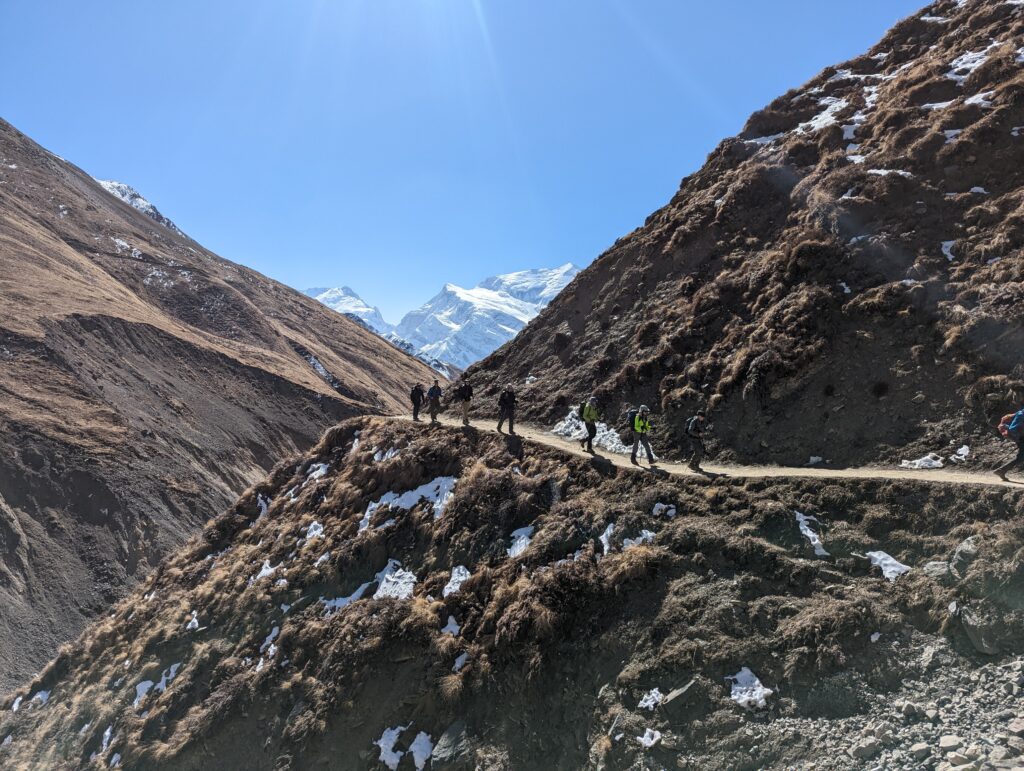
Fellow trekkers
Throughout your journey on the Annapurna circuit trek, you’ll definatley cross paths with other enthusiasts. Mornings tend to be bustling as most trekkers set out early, making the trail relatively crowded for the first 10 min. As noon approaches, the number of hikers dwindles, given that many stop for lunch breaks or adjust to the altitude. If solitude and serenity are what you’re after, an early start around 7 a.m. might be your best bet.
Trail markings
Signage on the Annapurna Circuit is infrequent and can be inconsistent. Fortunately, the trail’s design mostly keeps things straightforward. A primary path serves as the main artery of the trek, with occasional branches leading to alternate destinations. If you decide to venture off on a side route, simply retrace your steps to return to the main trail. A reliable map and/or a GPS device could be beneficial, but for the most part, the way is intuitive.
Difficulty of the trail
At first glance, the trail might seem moderately challenging, given that its inclines aren’t excessively steep or prolonged. However, the real test of the Annapurna Circuit trek isn’t necessarily its topography but the altitude. Spending 5 to 7 days at elevations exceeding 3.5 km can be demanding, especially with the thinning air exerting stress on the body.
The ascent to the pass is particularly grueling. On this day, trekkers typically embark as early as 4 a.m., navigating the trail for up to 12 hours.
The physical challenge, coupled with the reduced oxygen levels, makes this day an endurance feat.
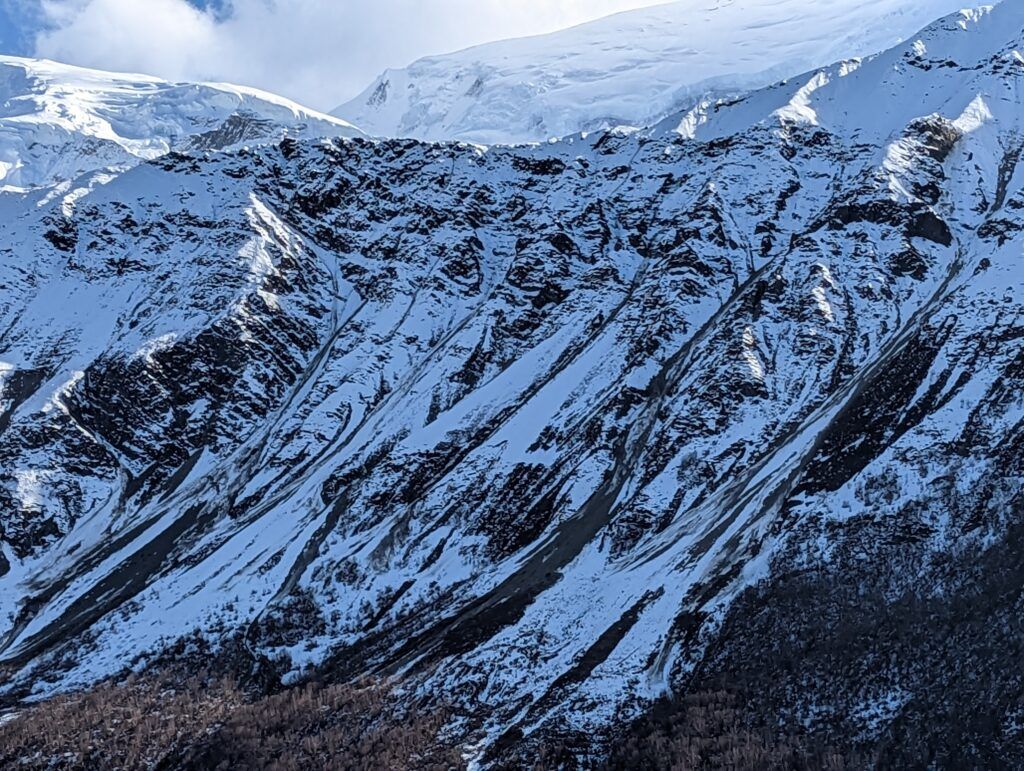
Weather
Most of the time, you can anticipate dry conditions on the trail. Daytime temperatures are quite mild, often allowing you to hike comfortably in just a t-shirt.
However, as the sun sets, the mercury drops, leading to chilly evenings. The trek’s colder stretches are mainly concentrated around the two days leading up to the ascent of Annapurna Pass.
Particularly in November, nighttime temperatures can plummet in rare occasions to around -15°C, with daytime readings hovering around -5°C.
But take heart; when the sun makes its appearance, it warms things up considerably.
Water
While the trail meanders alongside numerous streams, it’s crucial to note that this water isn’t safe for direct consumption.
To stay hydrated and healthy, it’s recommended to either carry water purification tablets or a reliable water filter.
Bottled water is available at various points along the way. However, if you opt for this, remember to pack the empty bottles out with you to help maintain the pristine nature of the Annapurna mountains.
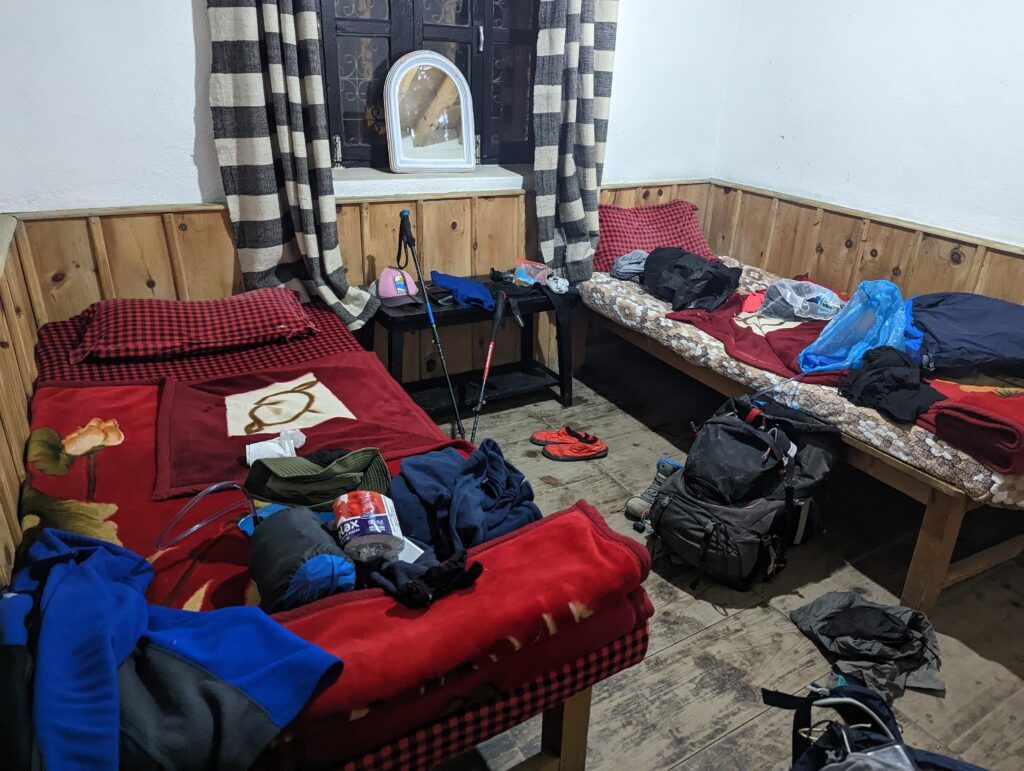
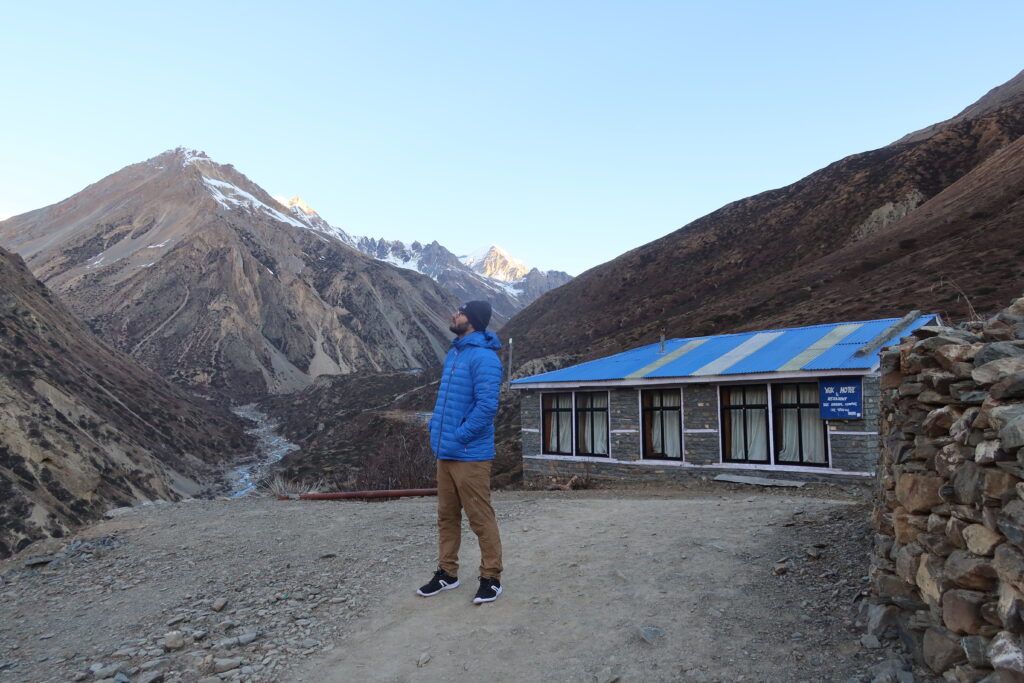
Accommodations
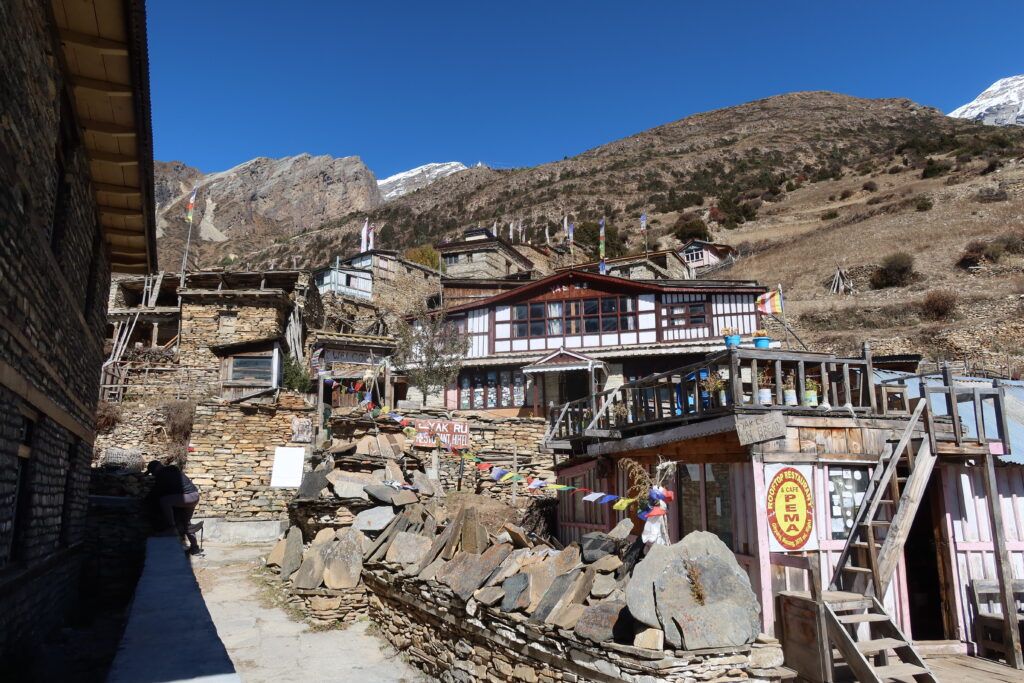
Every village you traverse will have lodging options, eliminating the need for pre-booking. Many of these accommodations provide free rooms, as long as you commit to having both your breakfast and dinner at their establishment.

And unlike many trekking destinations, you’ll likely have the luxury of not bunking with a dozen other travelers unlike in Europe.
Dining on the Trail
![]()
You won’t go hungry on the Annapurna Circuit. Villages dotting the trail boast eateries, ensuring you have places to refuel.
As you ascend, you’ll notice a spike in food prices and a dwindling menu variety.
That said, globalization has made its mark even here. For instance, you can savor a pizza in Manang, situated at a dizzying 2.1 mi (3.5 km)!
Typical Cuisine
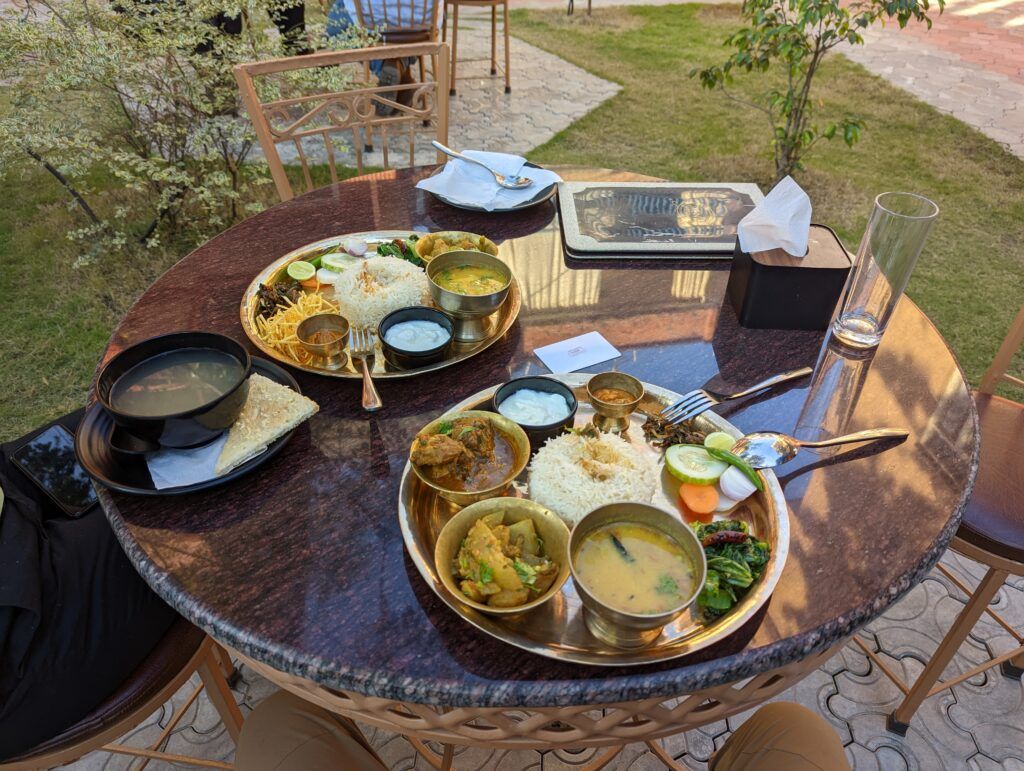
The local gastronomy is an eclectic mix. From the delicious dumplings known as momos to various teas and even yak burgers, there’s plenty to satiate your taste buds.
Wifi
Staying connected during your Annapurna Circuit trek is relatively easy. Wifi services are available throughout your journey, except for a brief period: the three days leading up to the pass from Manang.
So, you’ll have ample opportunities to share moments and update loved ones on your progress.
On another note, mobile reception is almost non-existent.
Hot Showers
After a long day of trekking, there’s nothing quite like a warm shower to rejuvenate the body and spirit.
Fortunately, most accommodations on the circuit understand this need. They typically offer hot showers, and the cherry on top? They’re often free of charge.
This ensures that you can always refresh and recharge, ready to take on the next day’s adventure.
Altitude Effects

As you ascend the Annapurna Circuit, one of the most notable changes you’ll experience is the effect of altitude. When you surpass the 8,200 feet (2,500 meters) elevation mark, even the gentlest slopes can start to feel like daunting hills. The thinning air means your body receives less oxygen with each breath, making physical activities more strenuous than they would be at lower altitudes.
Below is a generic outline on mountain sickness. Best is to talk with a doctor or a medical/trained expert to have 100% accurate outline.
What is Altitude Sickness?
Altitude Sickness, or Acute Mountain Sickness (AMS), occurs when you cannot get enough oxygen from the air at high altitudes. This can result in a range of symptoms that can range from mild to life-threatening. It typically can occur starting at above 8,200 feet (2,500 meters).
How to Recognize It?
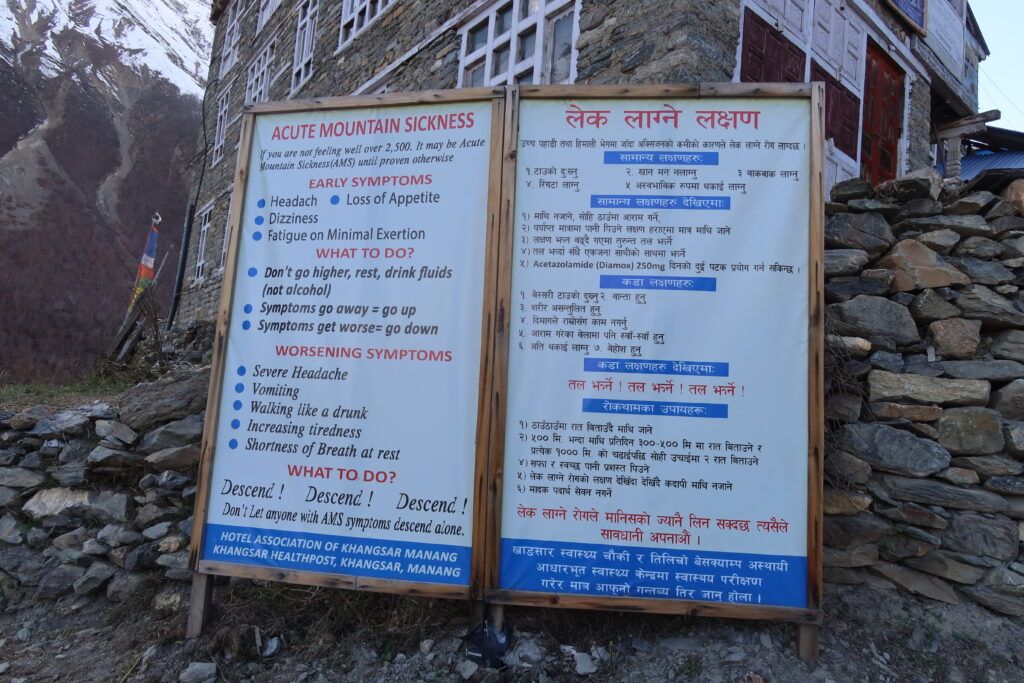
The symptoms of Altitude Sickness can be similar to those of a hangover. They include:
- Headache from mild to severe
- Dizziness or light-headedness
- Nausea or vomiting
- Fatigue and loss of energy
- Shortness of breath
- Problems with sleep
Stages of Altitude Sickness:
- Mild AMS: Symptoms are similar to a hangover. They can be uncomfortable but are not serious. Rest, hydration, and over-the-counter medications (like paracetamol) can help.
- Moderate AMS: Symptoms worsen and may include severe headache (not relieved by medication), nausea and vomiting, increased weakness and fatigue, shortness of breath, and decreased coordination (ataxia).
- Severe AMS: This is a life-threatening situation where symptoms get worse and can also include a tight or congested chest, inability to walk, a declining mental status, and fluid buildup in the lungs and brain. This is ussualy recognizable when you see the person acting like a drunk, loss of cordination and delirous.
- High Altitude Pulmonary Edema (HAPE): This is a buildup of fluid in the lungs. Symptoms can include difficulty breathing even at rest, a persistent cough, and a feeling of tightness in the chest.
- High Altitude Cerebral Edema (HACE): This is the most severe form of altitude sickness and involves swelling of the brain. Symptoms can include headache, loss of coordination, weakness, and a decreasing level of consciousness, including coma.
How to Fight It?
- Acclimatization: This is the most crucial measure. Ascend slowly, allowing your body time to adapt to the reduced oxygen at higher altitudes. Sleep no more than 0.3 mi (500 m) above the altitude where you last rested.
- Hydrate: Drink plenty of water, and avoid alcohol as it can increase dehydration and worsen AMS.
- Diet: Eat a high-calorie diet while at altitude.
- Medication: Drugs like Acetazolamide (Diamox) can help prevent and reduce the severity of AMS. Talk with your doctor about.
- Descent: If symptoms become severe or do not improve with rest, it is crucial to descend to a lower altitude immediately.
- If you experience mild AMS, either descend or remain at your current altitude. If your symptoms worsen at any time, it’s crucial to descend. If you still feel symptoms the next day, even at the same or a lower altitude, take additional time to rest. Only proceed to a higher altitude if you are symptom-free.
Listen to the experts
While in Manang, make sure to attend the daily 3 p.m. lesson on altitude sickness. It offers trekkers invaluable information on recognizing, preventing, and treating altitude-related issues.
In conclusion, while altitude sickness can be concerning, with the right precautions and knowledge, most trekkers can safely enjoy high-altitude environments. Always prioritize your health and safety, and when in doubt, descend.
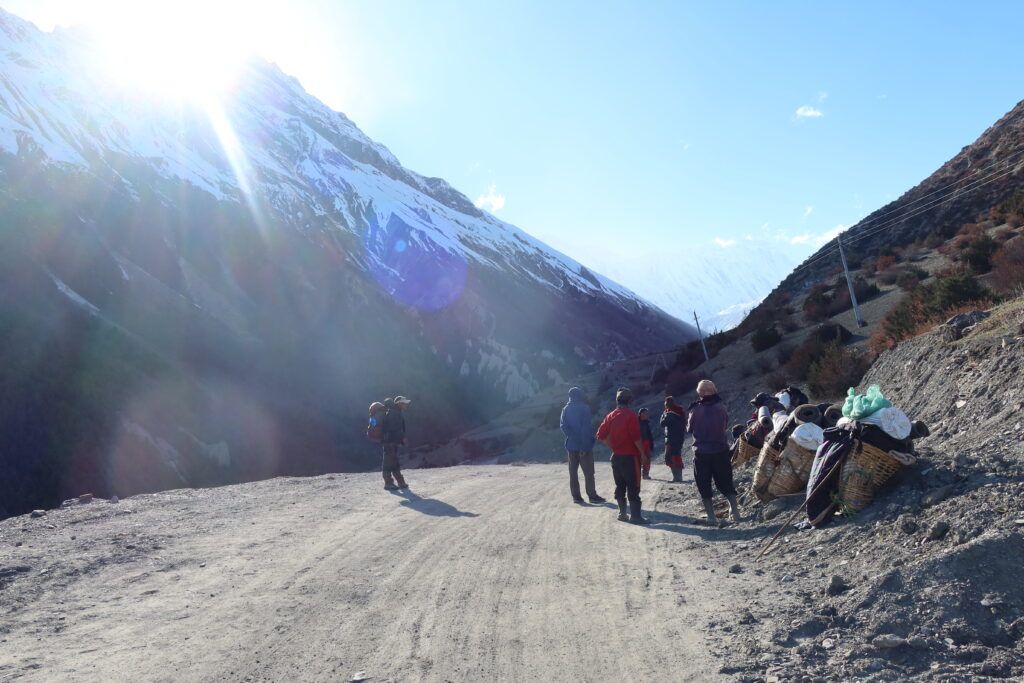
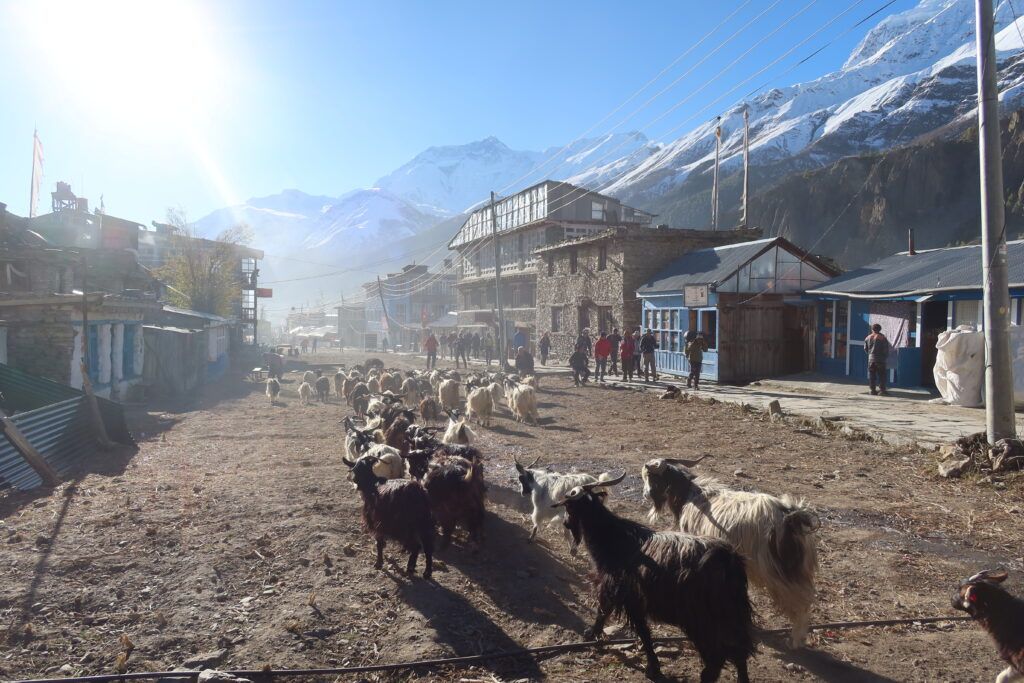
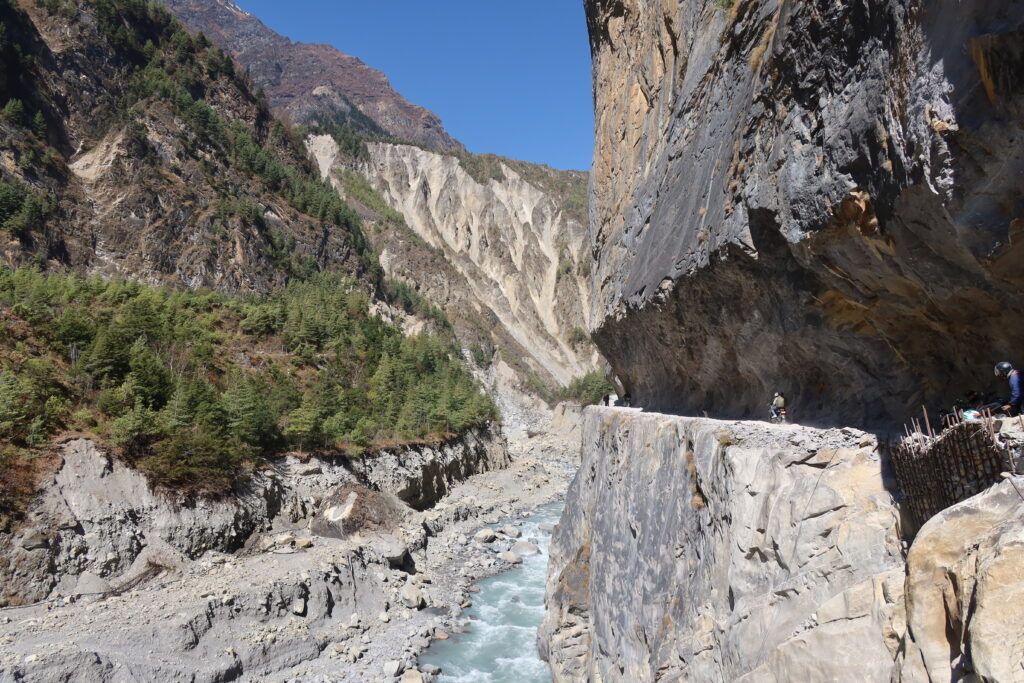
Jeeps and dust
The expansion of road networks is evident in the Annapurna region. The road now extends to Manang and is in progress towards Tilicho Lakes.
There’s also a connecting route being constructed from the capital of Lower Mustang to Pokhara.
Jeep traffic churns up dust, making the hike less enjoyable, especially for those behind the vehicles. The situation tends to worsen as you approach and proceed past Jomson.
Alternate Trails
Though new trails have been developed to circumvent these roads, their stability can sometimes be compromised, especially after heavy rains. If you find these trails washed out, your only alternative will be the jeep road.
Exiting the Trek
Up to Manang
You have the option of chartering a jeep at every village to make your way back, although this could be more expensive than your journey up.
Beyond Thorong La
Once you’ve scaled the pass and arrived in Muktinath, you can easily exit the trail in every village that you pass by. Here, you can choose from several modes of transportation.
- Jeep or Bus: Both are available, but be prepared for a hair-raising experience. Some parts of the route are precarious, with the vehicle seeming to hang off the edge of the cliff.
- Air Travel: If you make it to Jomson, flights are available. However, it’s essential to note that while convenient, Nepal’s domestic flights have raised safety concerns in the past due to the challenging topography and weather conditions.
Packing List
For the Annapurna circuit trek, there’s no immediate need to bring everything from home.
Kathmandu’s Thamel district offers a wide array of trekking essentials at a fraction of the price you’d pay for branded items elsewhere.
That said, certain core items are better owned and tested before your trip to ensure comfort and fit.
Core Items to Own Before Your Trip
- Hiking Shoes: Ensure they are well broken in to prevent blisters and discomfort.
- Backpack (50-55L): Invest in one that’s ergonomically designed for your back to avoid strain.
- Thermal Wear: Thermo pants and a t-shirt are essential for the chilly conditions at night.
- Hiking Pants: Preferably quick-dry and lightweight.
- Water Purification: A filter or purification tablets to ensure safe drinking water.
- First Aid Kit: Stock it with essentials like band-aids, antiseptic wipes, painkillers, and any personal medication.
- Compass: A vital navigation tool, even if you have a guide.
Items to Purchase in Nepal
- Sleeping Bag: Crucial for warmth as some accommodations might only provide blankets.
- Clothing:
- T-shirts (x3)
- Long sleeve shirts
- Fleece jacket
- Windbreaker
- Down jacket
- Snow/rain/wind-protective pants
- Rain Cover: For your backpack.
- Footwear: Slippers for evenings.
- Headwear: Hat for sun protection.
- Headwear 2: Hat for the cold weather above 2.2 mi (3.5 km)
- Eyewear: Sunglasses with UV protection.
- Hydration: A durable water bottle.
- Navigation: Map
- Walking poles for stability.
- Miscellaneous:
- Travel towel
- Sunscreen
- Toiletries
- Headlamp
- Crampons (Optional, based on the season and your pass-crossing timing)
Total spent – $90 p.p.
Where to Shop
We sourced our items from Himalayan Trekking Gear at Mandala Street, Kathmandu 44600, Nepal. Remember to closely inspect any item you buy, especially for defects like broken zippers.
After the Trek
Once your trek concludes, consider selling your equipment in Pokhara. Typically, you might recoup about 20-30% of what you paid.
Alternatively, explore selling options on local FB groups, or even better, donate to Tibetan refugees near Jomson or in the nearby camps in Pokhara. Your generosity will be much appreciated.
Additional Things to take
Insurance:
- Before embarking on such a trek, always ensure that your travel insurance policy covers high-altitude treks.
- Confirm that it includes provisions for helicopter evacuations. The remote nature of parts of the Annapurna circuit can mean that, in emergencies, helicopter evacuation might be your only way out.
- Remember to read the fine print and understand the terms and conditions. This is not a place to cut corners; the right insurance could literally save your life.
Cash and cards:
- While ATMs might be accessible in major towns like Pokhara or Kathmandu, once on the trail, it’s a cash-based economy.
- In 2022, we budgeted $800 for two people which sufficed for hut stays, food, and other miscellaneous expenses.
- While credit/debit cards might not be accepted on the trail, they’re good to have for larger expenses or in more urban areas.
When to cross Thorong La Pass
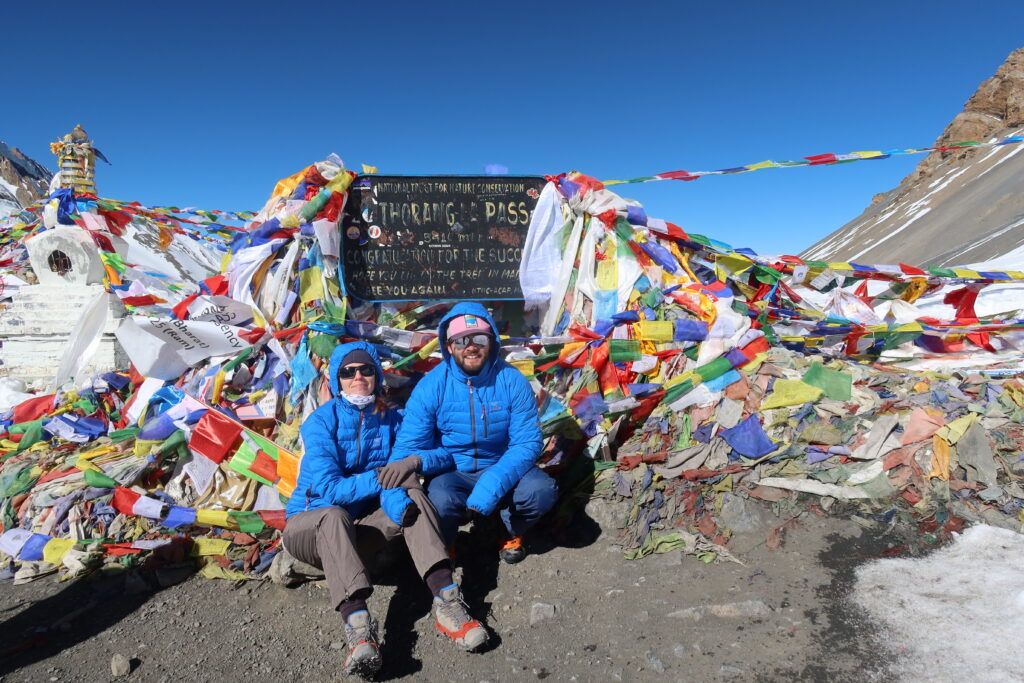
Crossing the pass is undoubtedly the most challenging part of the Annapurna Circuit Trek, both in terms of distance and physical exertion. At a stretch of 9 mi (15 km) and elevation gain of 3280 ft (1 km), preparation is essential. Here are some personal key insights and tips for this leg of the journey
- Start Early
- Heeding the advice of locals, it’s prudent to begin your trek by 4:30 am. Climbing in the cooler pre-dawn hours means you’ll be exerting yourself less under the intense sun, especially given the high altitude.
- Altitude sickness can strike swiftly and with severity. The combination of high altitudes with the intense heat can make symptoms worsen quickly. Make sure you are keeping an eye on your partner for sever Altitude sickness signs.
- Safety Concerns:
- Mountain weather is notoriously unpredictable. Morning climbs offer a reduced chance of adverse weather conditions which can roll in during the afternoon.
- Starting early also provides you with a longer window to reach the summit, allowing for more frequent rests without the pressure of the descending in the night.
- Footwear and Crampons:
- The conditions at the top can vary drastically based on the season. For some, the pass may be icy, necessitating the use of crampons for a safer trek.
- To stay informed about current conditions, join Facebook groups or relevant WhatsApp groups where fellow trekkers share real-time updates. In our experience, the pass was icy, making the crampons invaluable. However, in other seasons, the snow might be minimal, rendering them unnecessary.
Preparation is vital. This trek is as much a mental challenge as it is a physical one. Equip yourself with the right information, listen to those with experience, and ensure you have the appropriate gear for the conditions. This will maximize your chances of successfully navigating the pass.
10-Day Annapurna Circuit Trek Itinerary
Day 1 – Kathmandu – Chame
- Distance – 147 mi (238 km)
- Hours hiking – 0
- Hours in a bus/car – 14 h
- Difficulty- Hard (on your butt)
- A place to stay – We stayed in Moonlove Hotel (had no hot water)
Day 2 – Chame – Upper Pisang
- Distance – 9.3 mi (15 km)
- Hours Hiking – 5 hours
- Elevation Gain – 2,497 ft (761 m)
- Elevation Loss – 456 ft (138 m)
- Difficulty – Moderate
- A place to stay – Hotel Royal Nyeshang Cottage (Free Hot Water)
Day 3 – Upper Pisang via Ghyaru – Braka/Manang
- Distance – 12.4 mi (20 km)
- Hours hiked – 7h
- Elevation Gain – 4,400 ft (1341 m)
- Elevation Loss – 3,533 ft (1076 m)
- Difficulty- Moderate / Hard (the first few hours after the Upper Pisang)
- A place to stay – Himalayan Lodge
Day 4 – Acclimatization day (Milarepa Cave)
- Distance – 7.85 mi (12 km)
- Hours hiked – 4h
- Elevation Gain – 3,238 ft (986 m)
- Elevation Loss – 3,238 ft (988 m)
- Difficulty- Moderate/Hard
- Note – These are optional, and you can choose other day hikes that are around Manang
Day 5 – Acclimatization day (Old Lady House)
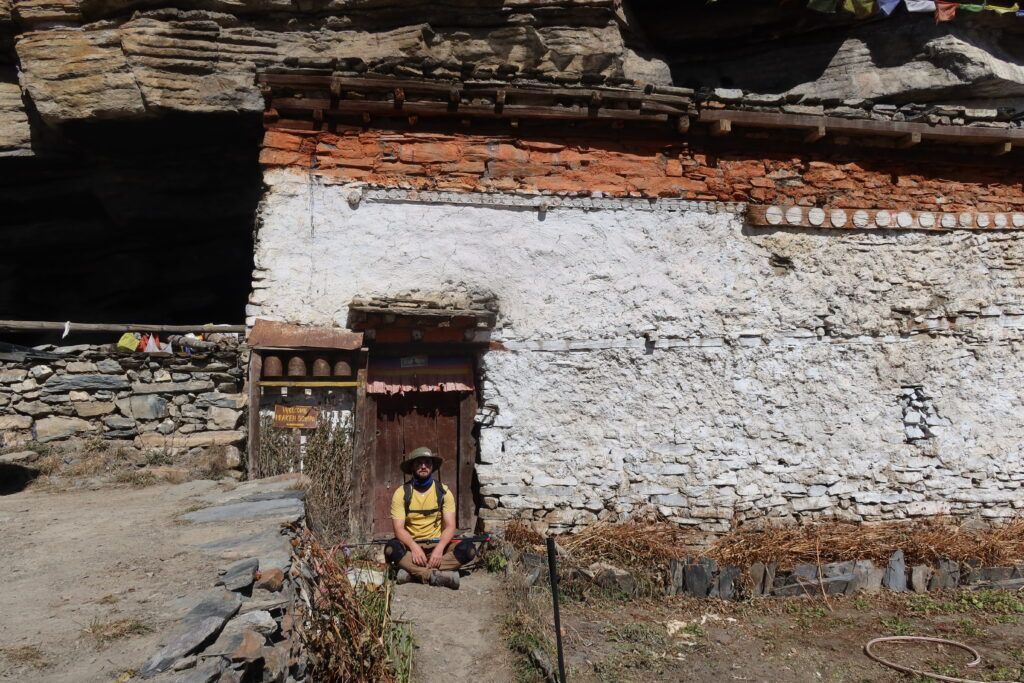
- Distance – 1 mi (1.7 km)
- Hours Hiked – 3 h
- Elevation Gain -1640 ft (500 m)
- Elevation Loss – 1640 ft (500 m)
- Difficulty – Moderate
- A place to stay –
- Note – These are optional and you can choose other day hikes that are around Manang
Day 6 – Acclimatization day (Middle Khangsar)
- Distance – 8.3 mi (13.5 km)
- Hours Hiking – 5 h
- Elevation Gain – 2,902 ft (900 m)
- Elevation Loss – 2,902 ft (900 m)
- Difficulty- Easy / Moderate
- A place to stay – Gangapurna hotel (Manang)
- Note – These are optional and you can choose other day hikes that are around Manang
Day 7 – Manang – Yak Kharka
- Distance – 6.2 mi (10 km)
- Hours Hiking – 4h
- Elevation Gain – 1640 ft (500 m)
- Elevation Loss – N/A
- Difficulty- Easy / Moderate
- A place to stay – Hotel Yak Kharka
Day 8 – Yak Kharka – Thorong Phedi (Lower Base Camp)
- Distance – 4.3 mi (7 km)
- Hours Hiked – 3h
- Elevation Gain – 1394 ft (425 m)
- Elevation Loss – N/A
- Difficulty – Moderate/Hard
- Danger Area – Right before the lower base camp (Phedi) there is an area of rockfall for around 20 min
- A place to stay – Hotel New Hill Top
Day 9 – Lower Base Camp Phedi – Muktinah
- Distance – 9.3 mi (15 km)
- Hours hiked – 12h
- Elevation Gain – 3412 ft (1040 m)
- Elevation Loss – 5314 ft (1620 m)
- Difficulty- Very Hard
- A place to stay – Hotel Bob Marley (it’s an OK place)
Day 10 – Muktinah – Braka – Jomson
- Distance – 11 mi (18 km)
- Hours hiked – 7h
- Elevation Gain – 1306 ft (398 m)
- Elevation Loss – 3937 ft (1200 m)
- Difficulty- Hard
- A place to stay – Hotel Ammonite
Additional Things to know
- Phone Coverage: While major towns on the Annapurna Circuit, like Manang and Jomsom, have cell reception, many sections of the trail will have weak to no signal. However, most of the villages will have great wifi access.
- Language: The primary languages spoken are Nepali and Tibetan dialects. However, due to the trek’s popularity, many locals, especially in teahouses and guesthouses, will speak a basic level of English.
- GPS: Carry a physical map and a compass as backups. Since it tends in places to go haywire.
- Accommodation: Most places will have sufficient lodges or teahouses. However, during peak trekking season, popular stops might be busier, so an early arrival can be beneficial.
- Toilet Paper: Many teahouses don’t provide toilet paper, so it’s essential to carry your own. Consider also bringing a small bottle of hand sanitizer.
- Respect Local Customs: It’s essential to understand and respect the local customs. Dress modestly, ask for permission before taking photos, and understand the traditional way of greeting (Namaste with palms together).
- Environmentally Conscious: Pack out what you bring in. The trail has limited resources to deal with trash. Consider carrying a reusable water bottle and purifying your own water rather than buying bottled water.
- Permits: Ensure you have the necessary trekking permits and TIMS (Trekkers’ Information Management System) card. Checkpoints along the route will verify these at least 2 times.
Costs & prices
- Flights: $750
- Hotels in Kathmandu and Pokhara – price ranges anywhere from $10 to as much as you want.
- Permits:
- ACAP (Annapurna Conservation Area Permit): Approximately $30.
- TIMS (Trekkers’ Information Management System) Card: Approximately $20 for individual trekkers.
- Accommodation:
- Assuming an average of $10 per night for 11 nights, it’s about $110 in total. This is a conservative estimate, as some places might be cheaper while others might be slightly more expensive. It’s also worth noting that many teahouses offer free or very cheap accommodation if you dine with them.
- Food & Drinks:
- Budgeting about $20 to $25 daily for three meals, which comes to about $220 to $275 for 11 days. Prices increase as you ascend due to the effort required to transport goods.
- Transportation (inside Nepal):
- Bus – $10 p.p
- Jeep from Kathmandu to Besisahara: $50 p.p
- Jeep from Besisahara to Chame: $30 p.p
- Jeep from Dumre – Besisahara: $20 p.p
- Exit transportation (jeep, bus, or plane) from Muktinath or Jomsom back to Pokhara or Kathmandu: Approximately $20 to $250, depending on the mode of transportation.
- Equipment & Supplies: we spent around $90 p.p
Total Estimated Cost for hiking (excluding international flights and hotel stays before and after the hike): about 550 p.p.
Common Scams
- Guides Overcharging: Always agree upon a rate before hiring a guide, and make sure everything is clear regarding what is included in the fee. Don’t forget a 10% tip for both guides and sherpas.
- Extra Sherpas: Some trekking agencies might suggest you hire more porters or sherpas than necessary. It’s essential to assess your needs and remember that one porter can typically carry the luggage for two trekkers.
- Helicopter Evacuation Scam: Some unscrupulous guides might insist on a helicopter evacuation if you feel a bit unwell, even when it’s not necessary. They get a commission for each evacuation they call in. Always get a second opinion and rely on your judgment.
- Fake Permits: Ensure that you get the proper trekking permits from authorized offices. There have been cases where trekkers are sold fake or unnecessary permits.
- Overpriced Goods: In remote areas, goods can be expensive due to transportation costs. However, some sellers might overcharge tourists even more than the usual high price. It’s good to have an idea of average prices so you know what to expect.
- Overpriced Accommodation: While most teahouses are honest, some might overcharge unaware tourists. Always ask for the price before deciding to stay.
- Donation Scams: Some locals might approach you for donations for various causes. While many are genuine, some might be scams. If you want to donate, do it through established organizations.
- Unofficial ‘Fees’: You might encounter locals or even people dressed as officials claiming there’s a fee for passing a certain trail or taking photographs. Always ask for official identification and a receipt.
- Bills and Payments: In some places, especially if you’re not familiar with the currency, always double-check your bills and change.
- “Free” Offers: Be wary of anything offered as “free” or at an unbelievably low price. There might be hidden charges or conditions attached.
Conclusion
Overall, the Annapurna Circuit trek remains a remarkable journey. For those who haven’t ventured above 5000m, it’s an accessible trail to immerse yourself in such high-altitude experiences. Though the circuit is renowned for its breathtaking views and rich cultural insights, it’s essential to remember its inherent challenges. Prioritize your safety, be attentive to your body’s signals, and pace yourself when necessary. Safe trekking!